
Assets#
The Assets screen stores shared robot parameters in Orchestrator so that their values can be changed without editing processes. Select a group in the "Assets Groups" table to display its contents in the "Assets" table.
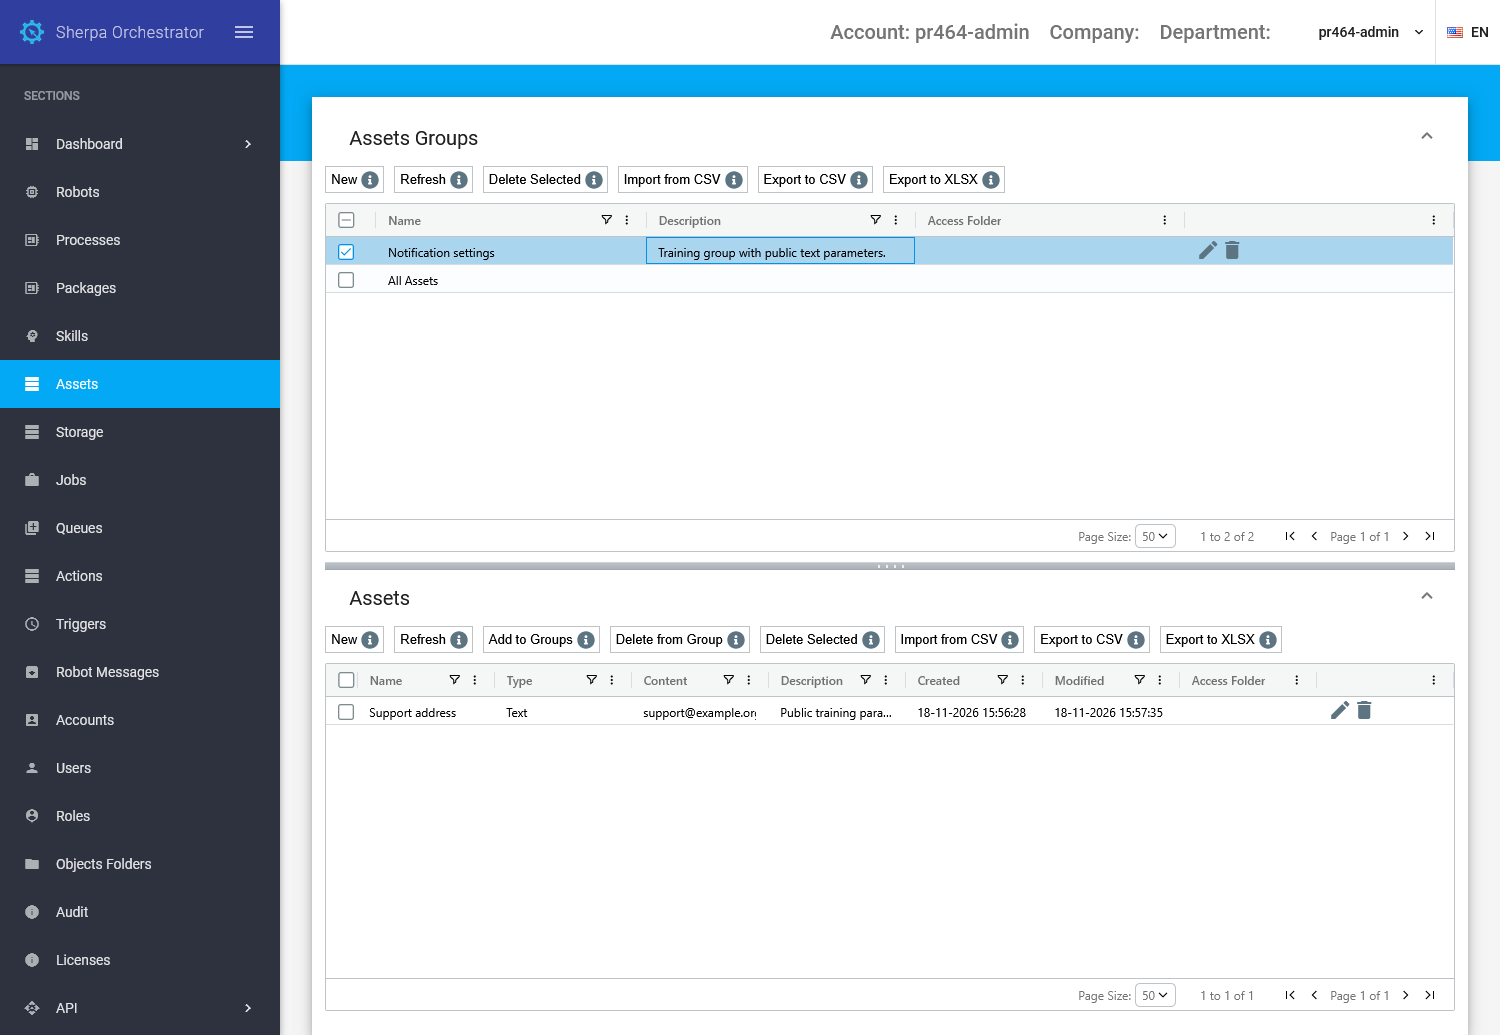
Assets screen with a sample asset group and text asset
Robots read and change values through the API or the Orchestrator palette in Sherpa Designer. Three asset types are supported: "Credentials" for a username and password, "Text" for a string, and "Calendar" for working and non-working days. Passwords are protected in Orchestrator storage. A configured Vault may hold the secret. These protections do not apply to exported files.
"All Assets" group and credential export#
This group helps find and export accessible account assets across their regular groups.
Each Account has its own protected "All Assets" Resource Group. It displays all undeleted Resources of that Account in the selected Access Folders available to the User. Each Resource appears once.
When a Resource is created, imported or added to an ordinary Resource Group, the Orchestrator also adds it to that Account's "All Assets" group. If the system group does not exist yet, it is created automatically. After the Orchestrator is updated, existing Resources with a missing link are also included in "All Assets".
Removing a link to an ordinary group preserves the Resource in "All Assets". Ordinary groups display only their members. Use "Add to Groups" for additional links. The system group cannot be renamed or deleted, and its membership cannot be changed manually. Selecting "All Assets" when creating or importing a Resource is supported.
To view Resources, open the Assets screen, select the available Access Folders and select "All Assets" in the "Assets Groups" table. To export without selecting rows, set the required filters in the "Assets" table and click "Export to CSV" or "Export to XLSX" above it. The file contains all matching Resources in the selected group, including records on other pages. When rows are selected, only the selected Resources are exported, subject to the current filters and access rights. Deleted Resources, data from another Account and inaccessible Access Folders are excluded.
Example: The Service address Resource was created in the Integration settings group. Select "All Assets" and refresh the Resource list. Service address appears in the "Assets" table because the Orchestrator automatically included it in both Integration settings and that Account's "All Assets" group.
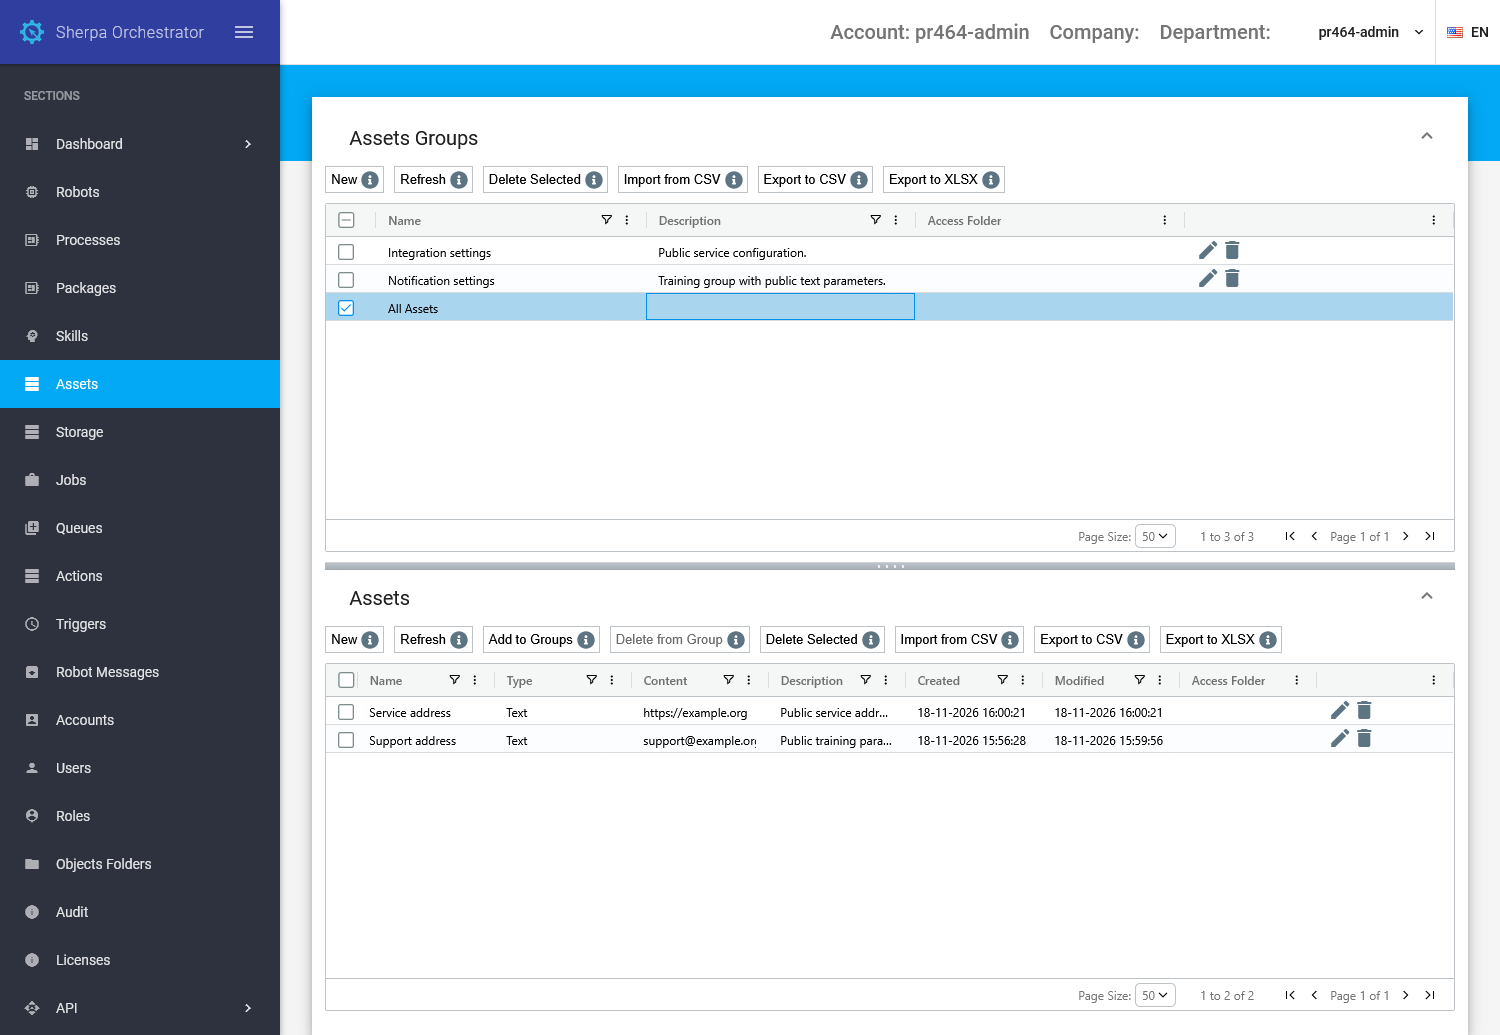
Assets screen: All Assets includes Service address from Integration settings
CSV or XLSX Resource exports write passwords in plain text, including secrets retrieved from Vault. Export only when needed, restrict access to the file, store and transfer it securely, and delete it after use.
"New" button in the "Assets" table#
Creating an asset moves a shared parameter from robot scripts into Orchestrator.
Before creating an asset, select the asset group in which it will be created by checking its box in the "Assets Groups" table.
After selecting the group, click "New" above the "Assets" table. The "Asset" dialog opens.
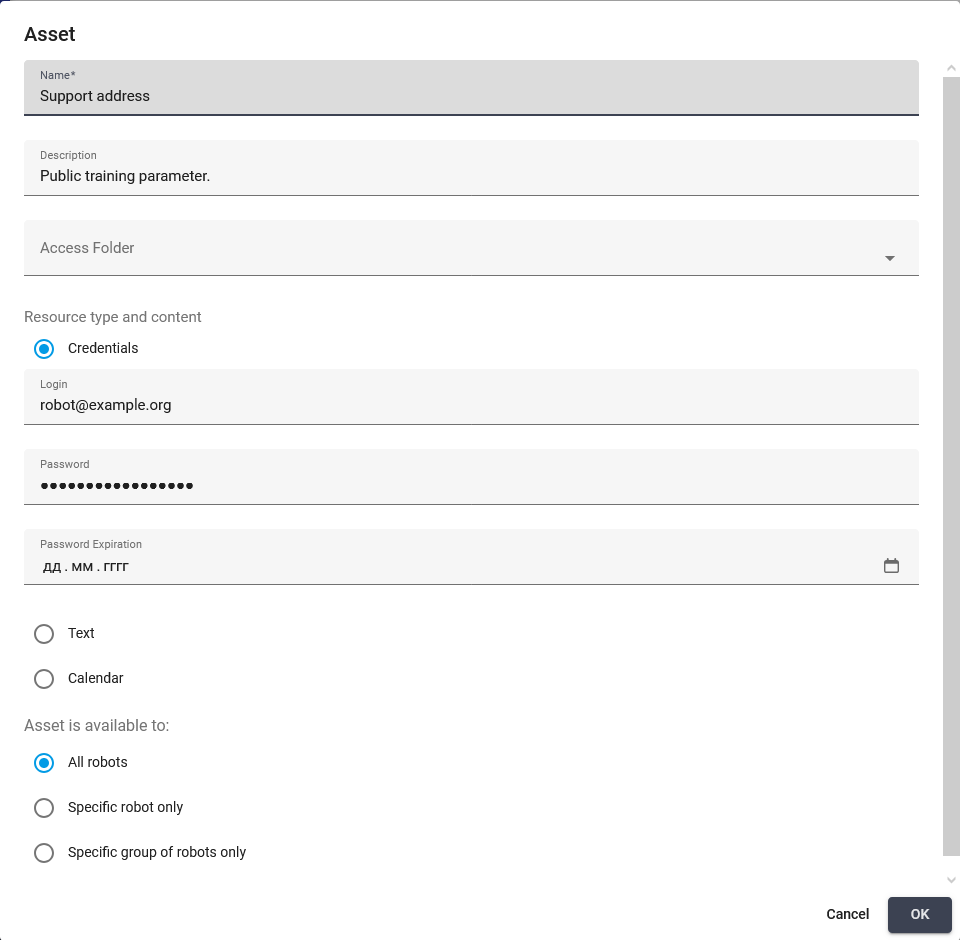
"Asset" dialog with the "Credentials" flag selected
Each asset type has the following common fields.
Required field:
- "Name" field — a name used to find and reference the asset. For example, "Support address".
Additional fields:
- "Description" field — explains where the parameter is used.
- "Access Folder" dropdown — the access folder in which the asset is created. Select an available folder when its permissions must apply to the asset.
"Credentials" flag#
This type centrally stores credentials used by a robot. Selecting the "Credentials" flag displays additional fields:
- "Login" field — the account name in the target system, for example,
robot@example.org. - "Password" field — the account password. Entered characters are hidden.
- "Password Expiration" field — the password expiration date. Specify it when the password requires periodic replacement. Expired entries are highlighted. The input format depends on the browser language.
"Text" flag#
A text asset stores a string of up to 10,000 characters, such as a service address, path, or number represented as text. Select the "Text" flag and enter the value in the "Text" field. This field does not store other asset objects.
In this example, set Description to Public training parameter.. Leave Access Folder empty. No access folder is selected for this example. Example: enter Support address in "Name", enter support@example.org in "Text", select "All robots", and click "OK". The saved asset appears in the selected group. The "Get Value" block in Sherpa Designer can read the string.
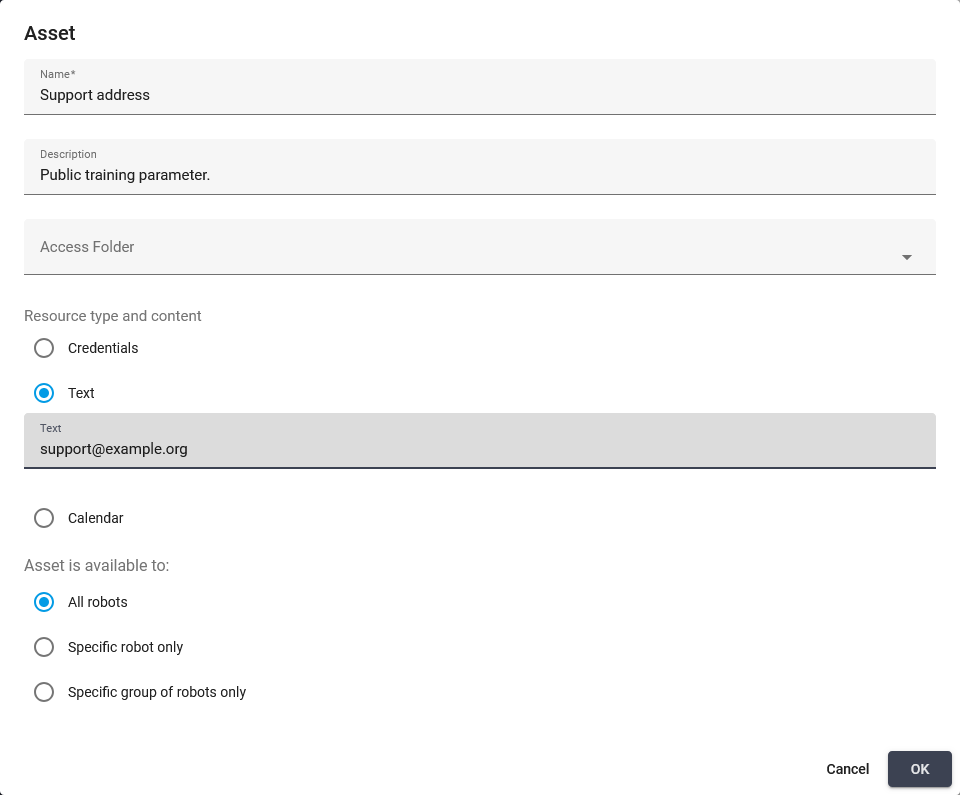
"Asset" dialog with a support address in the "Text" field
"Calendar" flag#
A calendar schedules robots on working days and calculates dates while accounting for weekends and holidays. Selecting the "Calendar" flag displays three buttons:
- "Edit calendar…" button — opens a monthly calendar for selecting dates.
- "Export calendar…" button — saves the calendar to a JSON file.
- "Import calendar…" button — loads a calendar from a JSON file.
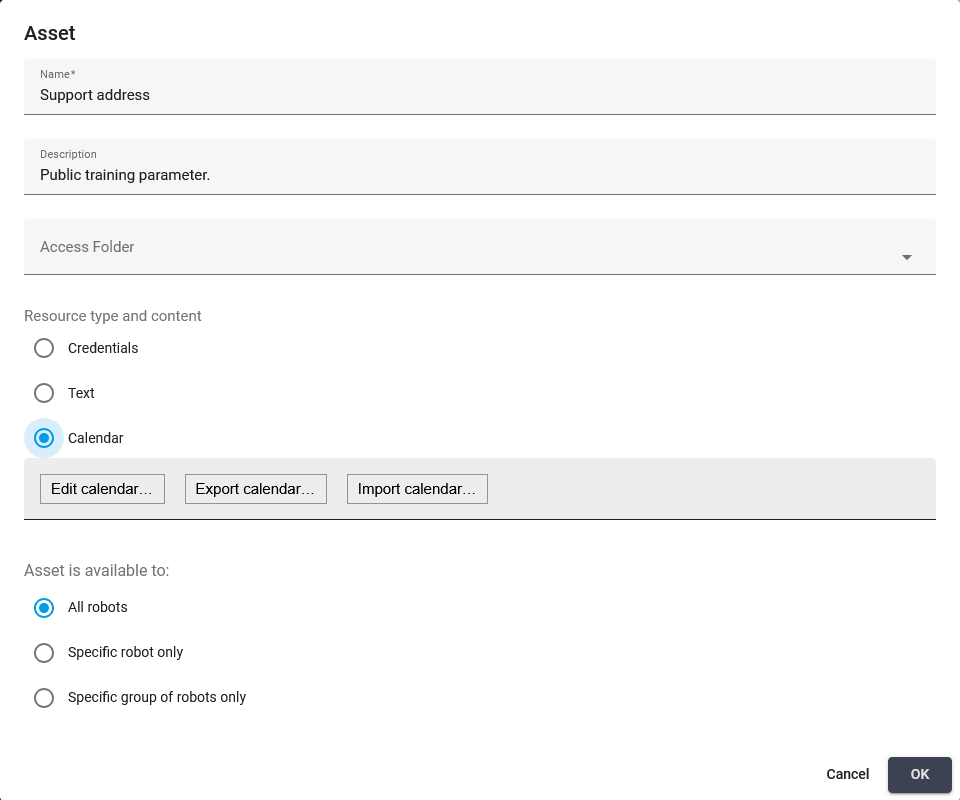
"Asset" dialog with the "Calendar" flag selected
Access to "Credentials" Resources in Sherpa Designer#
These blocks let a robot read or update credentials without storing a password in its script.
- To access "Credentials" Resources in Sherpa Designer, the "Get Credentials" block is used from the Orchestrator palette.
- The "Set Credentials" block is used to edit credentials.
This functionality is available for Robots of any type, both Attended and Unattended.
Access to "Text" Resources in Sherpa Designer#
These blocks transfer a text parameter between Orchestrator and robot variables.
- To access "Text" Resources in Sherpa Designer, the "Get Value" and "Set Value" blocks are used from the Orchestrator palette. You need to copy the GUID of the Resource available when editing the previously created Resource. Then, in Sherpa Designer, paste the GUID of the Resource into the "GUID/Resource Name" field on the properties panel.
After the "Get Value" block runs, the value from the Orchestrator’s "Text" field is passed to the "Result" variable in Sherpa Designer.
Access to "Calendar" Resources in Sherpa Designer#
The "Get Calendar" block passes a calendar from Orchestrator to a script for date checks and calculations.
To access "Calendar" resources in Sherpa Designer, the "Get Calendar" block is used from the Orchestrator palette:
-ui-en.png)
"Get Calendar" block in the Orchestrator palette
Enter the name or GUID of an existing Calendar asset in "CalendarGUID/Name*". The example uses "Work calendar":
-ui-en.png)
"Get Calendar" block properties with the calendar identifier field
There are also blocks in the "Date and Time" palette that can use the Calendar obtained from the Orchestrator for various checks and calculations:
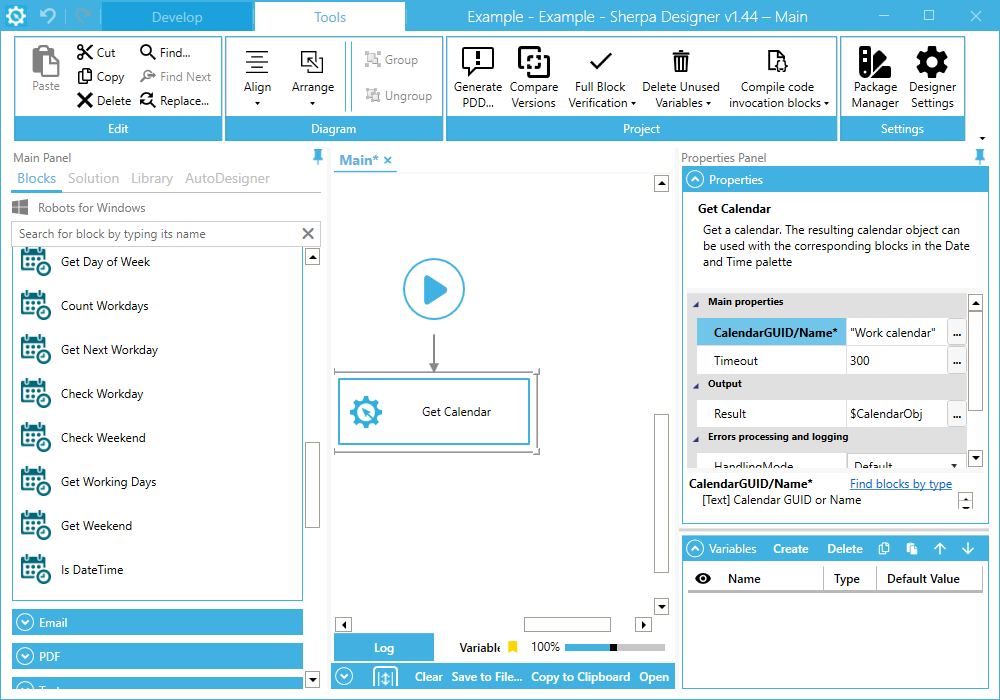
Calendar blocks in the "Date and Time" palette
- "Count Workdays" – counts the number of working days between two specified dates.
- "Get Next Workday" – returns the next working day starting from the specified date.
- "Check Workday" – checks the specified date for a working day.
- "Check Weekend" – checks the specified date for a non-working day.
- "Get Working Days" – retrieves working days between two specified dates.
- "Get Weekend" block — returns non-working days between two specified dates.
"Asset is available to:" block#
This block determines which robots in the account can use the value. It is at the bottom of the "Asset" dialog and contains three mutually exclusive flags.
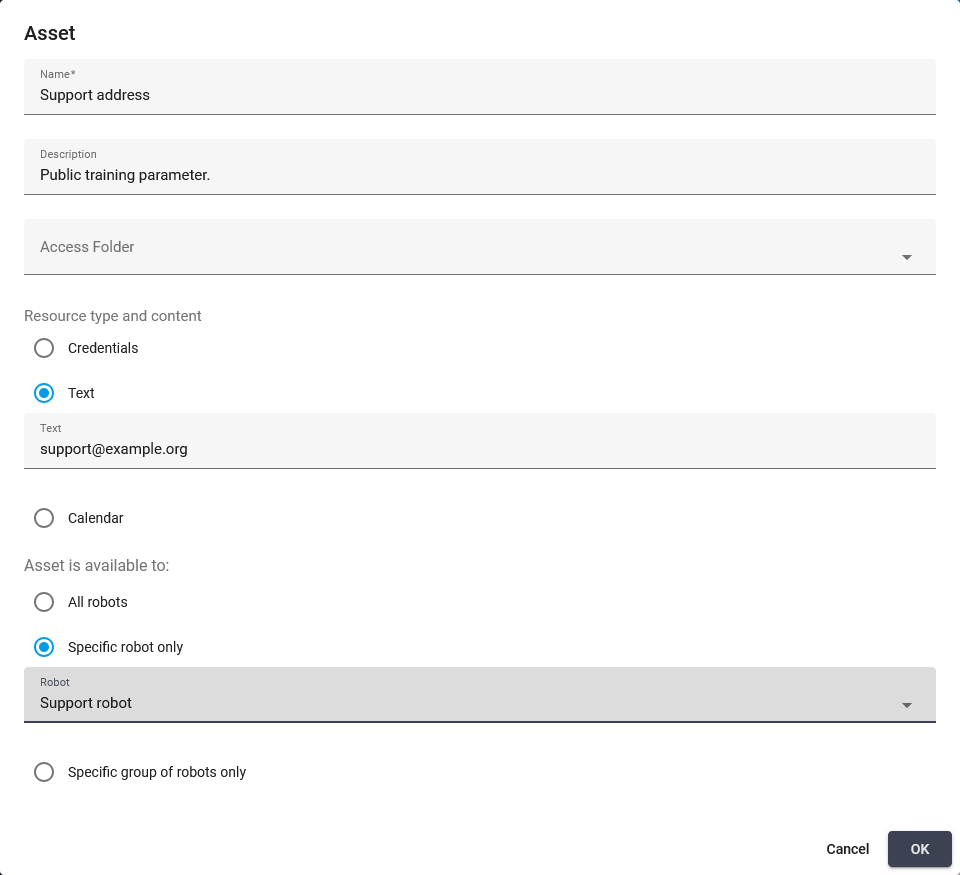
"Asset" dialog with the individual robot selector
"All robots" flag#
The asset is available to all robots in this account. No individual robot or robot group is selected.
"Specific robot only" flag#
This option limits use to one robot. After selecting the flag, choose the robot in the dropdown that appears.
"Specific group of robots only" flag#
This option makes the asset available to robots in the selected robot group. After selecting the flag, choose that group in the dropdown that appears.
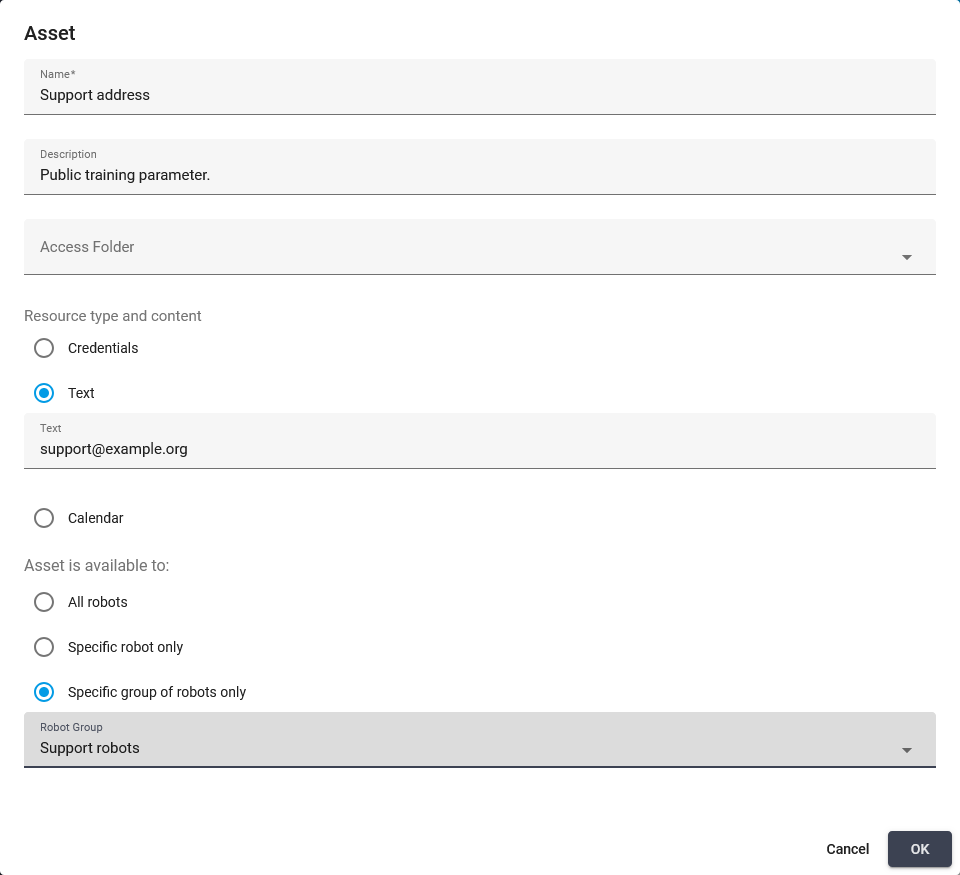
"Asset" dialog with the robot group selector
The "OK" button saves the asset. The "Cancel" button closes the dialog without saving the entered changes.
Asset edit button#
Editing replaces a shared parameter while retaining the asset identifier. Click the edit button  in the asset row. The "Asset" dialog opens with its current parameters and the "GUID" field. This field identifies the saved record and cannot be changed. Click "OK" to save the changes.
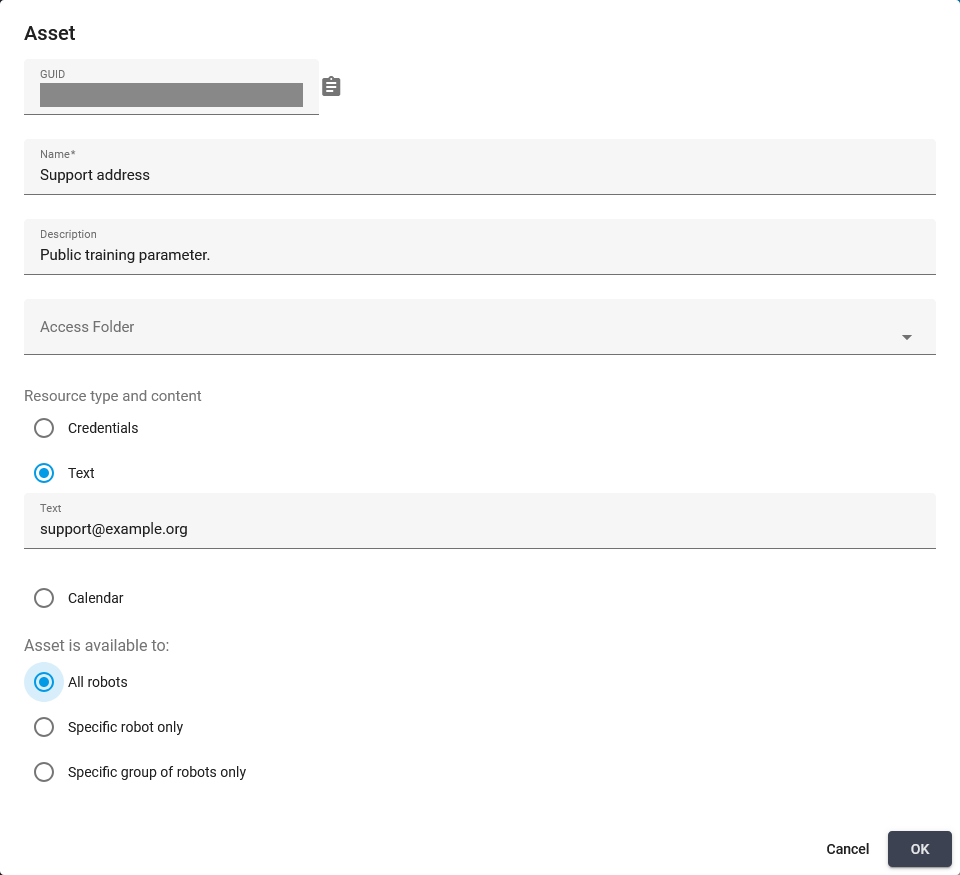
Asset dialog with the saved Support address parameters
"New" button in the "Assets Groups" table#
An asset group combines parameters used together. Click "New" above the "Assets Groups" table.
Required field:
- "Name" field — the asset group name.
Additional fields:
- "Description" field — the purpose of the group.
- "Access Folder" dropdown — the access folder for the group.
In this example, leave Access Folder empty. No access folder is selected for the asset group. Example: enter Notification settings in "Name" and Training group with public text parameters. in "Description". Click "OK". The new group appears in "Assets Groups". Select it to create the Support address asset. "Cancel" closes the window without creating a group.
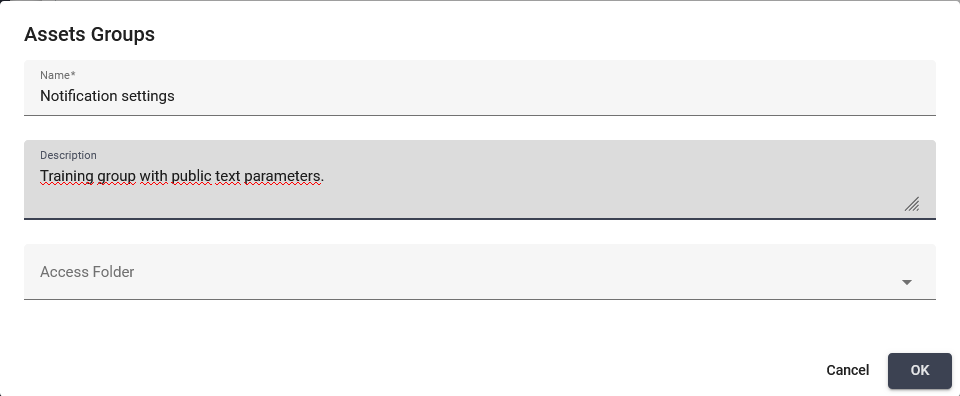
Asset group creation dialog with sample parameters
Asset group edit button#
Editing updates the name, description, and access folder of a regular asset group. Click the edit button in its row. The dialog displays the group parameters and a read-only "GUID" field. The "OK" button saves changes. The "Cancel" button closes the dialog without saving.
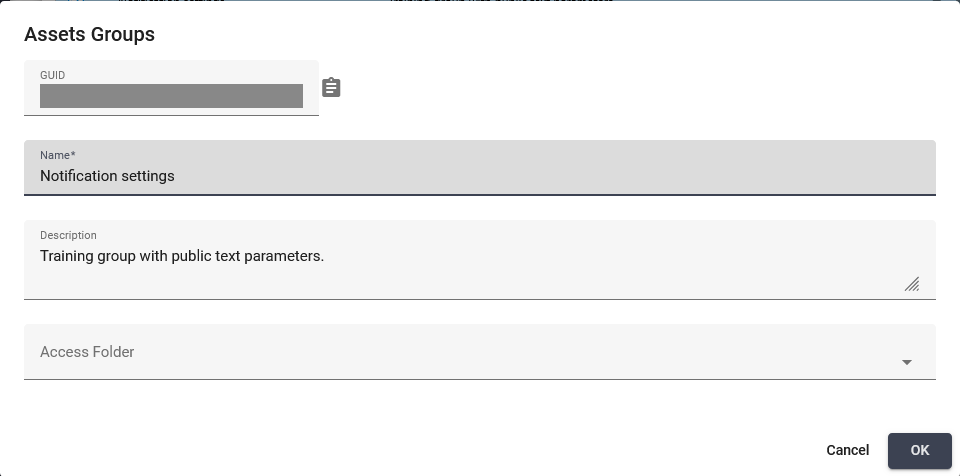
Assets Groups dialog with the saved Notification settings parameters